A mechanical keyboard puts a physical switch under every key instead of a sheet of rubber. That one difference drives everything else: how the key feels, how long it lasts, how loud it is, and how many keys the board can register at once.
This guide covers what is actually different, what the switch names mean, how the legends get onto the keycaps, and how to clean the thing once you own it. It is a reference — skim the table of contents and jump to what you need.
Membrane vs. mechanical
Most inexpensive keyboards use a flexible membrane under the keys. Pressing a key pushes the membrane down onto a bottom layer, closing a circuit and registering the keypress.
Two things follow from that design. You have to press the key all the way down for it to register, and there is little or no tactile feedback telling you when it did. Membrane switches are typically rated for around 5–10 million keystrokes.
A mechanical keyboard puts a discrete switch under each key. The switch actuates partway through the travel, before the key bottoms out, and most types give you a bump or a click at that point so you know it registered. Cherry MX switches are rated for 100 million keystrokes; the Gateron Red switches in the DeltaForce 65 are rated for 50 million.
Mechanical boards also handle simultaneous keypresses better. Full N-key rollover means every key you are holding is reported at once, with no ceiling and no dropped modifiers. This matters if you use a modal editor, chord-heavy shortcuts, or games that bind movement and actions together. Modern Das Keyboards do full NKRO over USB — older boards needed a PS/2 port for it, which is where the persistent "USB caps you at six keys" idea comes from.
The clicking is a matter of taste. Some people like it and some people share an office with someone who does not. Cherry MX Brown and the linear switches are the quieter options; see the comparison table.
Keyboard terminology
Worth knowing before the rest of this makes sense.
- Actuation force
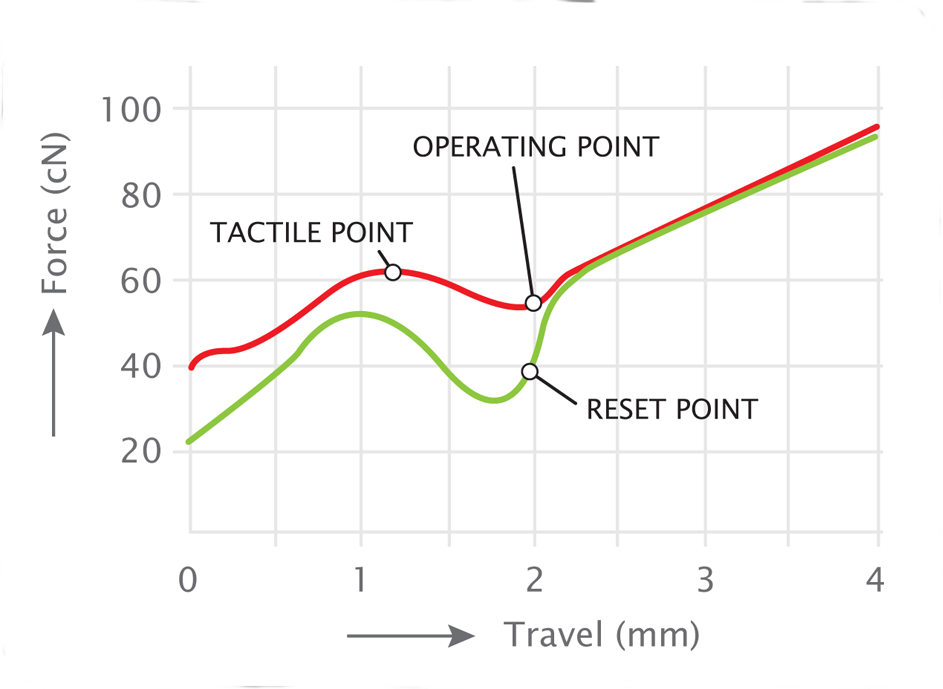
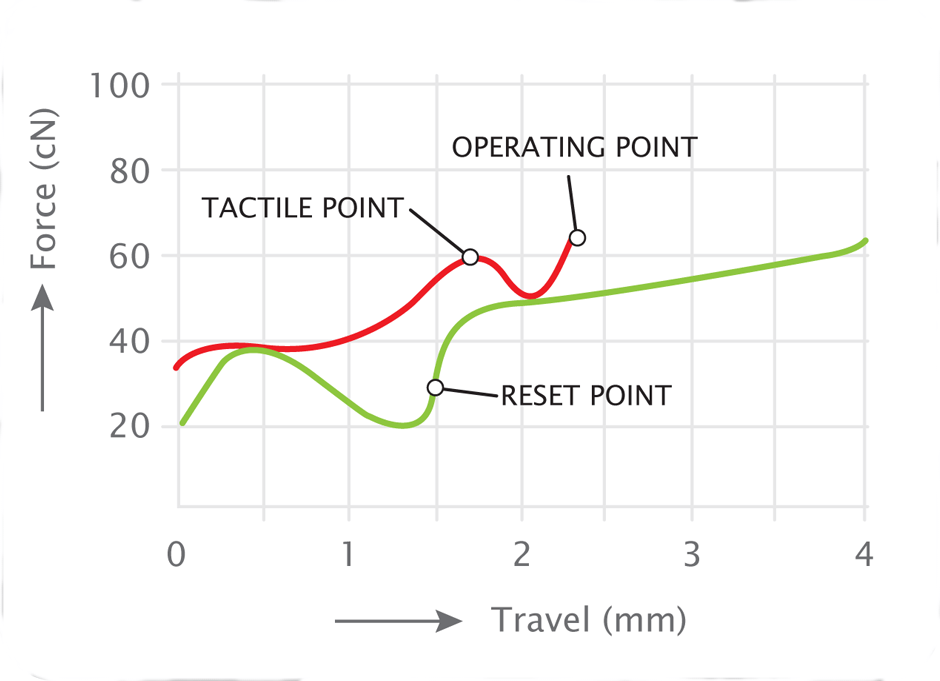
- How hard you have to press before the key registers, measured in centinewtons (cN). Lower is lighter. Cherry MX ranges from 45 cN (Red) to 65 cN (Clear).
- Actuation point
- How far down the key travels before it registers. On Cherry MX this is about 2 mm of a 4 mm total travel.
- Bottoming out
- Pressing the key all the way to the plate. On a mechanical board you do not have to; on a membrane board you do.
- Tactile bump
- A physical catch you feel at the actuation point. Present on Brown, Blue and Clear; absent on Red and Black.
- Linear
- No bump, no click — smooth all the way down. Red, Black, Gateron Red.
- Clicky
- An audible click mechanism separate from the bump. Blue.
- N-key rollover (NKRO)
- The number of keys the board can report simultaneously. "Full NKRO" means all of them.
- Ghosting
- A key you pressed that never reaches the computer, because the matrix could not report that combination.
- Hot-swappable
- Switches sit in sockets rather than being soldered, so you can change them with a puller instead of an iron.
- Tenkeyless (TKL)
- A full-size layout minus the number pad — 87 keys instead of 104.
- 65%
- Smaller still: 68 keys, keeping the arrows and navigation cluster but moving the function row onto a layer.
Switch comparison table
The short version. Actuation forces are the manufacturer's figures.
| Switch | Type | Actuation | Sound | Commonly chosen for |
|---|---|---|---|---|
| Cherry MX Red | Linear | 45 cN | Quiet | Fast repeat taps; gaming |
| Cherry MX Brown | Tactile | 55 cN | Quiet | Shared offices; typing and gaming both |
| Cherry MX Blue | Tactile + clicky | 60 cN | Loud | Typing, when nobody else can hear you |
| Cherry MX Black | Linear | 60 cN | Quiet | Heavier linear feel; double-tapping |
| Cherry MX Clear | Tactile | 65 cN | Quiet | A stronger bump than Brown, without the click |
| Gateron Red | Linear | 45 cN | Quiet | Hot-swap boards; smooth pre-lubed travel |
If you cannot try them first and other people can hear your desk, Brown is the safe default. If you want the click and you work alone, Blue. If you want nothing in the way of the keypress, Red.
Keycap shapes
Cylindrical
The top of the key is curved along one axis, so it dips front to back and stays flat side to side. This is the shape on nearly every modern keyboard, including every Das Keyboard.
Flat
No curve at all. Typically found on chiclet and laptop-style keyboards, where the key travel is short enough that the shape matters less.
Spherical
Curved on all four edges, with a spherical well in the centre of each key. Found on older typewriters such as the IBM Selectric, and on some vintage keyboards and enthusiast keycap sets.
Profiles
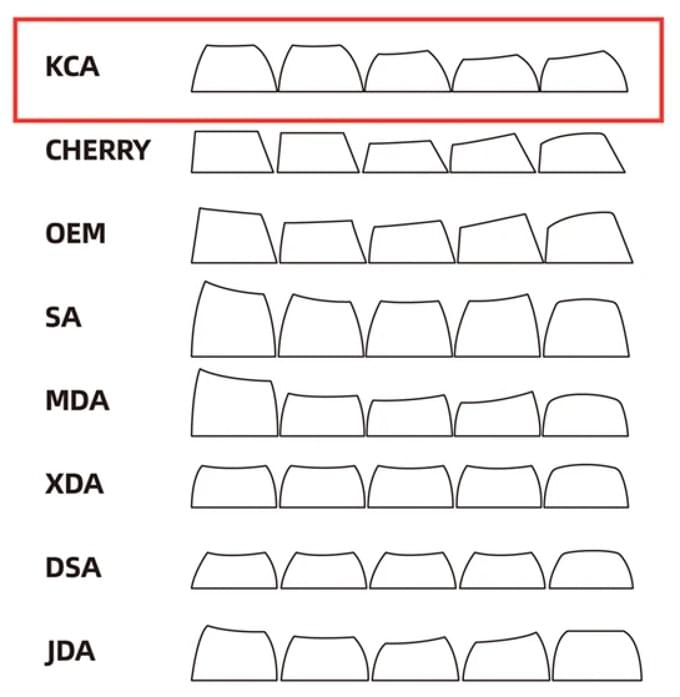
Shape describes the top surface of one key. Profile describes how the heights and angles change from row to row across the board. Sculpted profiles such as Cherry, OEM and KCA step and tilt each row towards your fingers; uniform profiles such as DSA and XDA make every row identical, which some people prefer and others find disorienting.
How legends are printed
The legend is the character printed on the keycap. There are four common ways to put it there, and they differ mostly in how long they survive.
Pad printing
The cheapest and most common method: the character is printed onto the finished keycap in a durable ink, usually with a clear coat over the top to extend its life. It is also the one that wears off first. Heavy typists can wear through pad printing on the keys they use most.
Laser etching
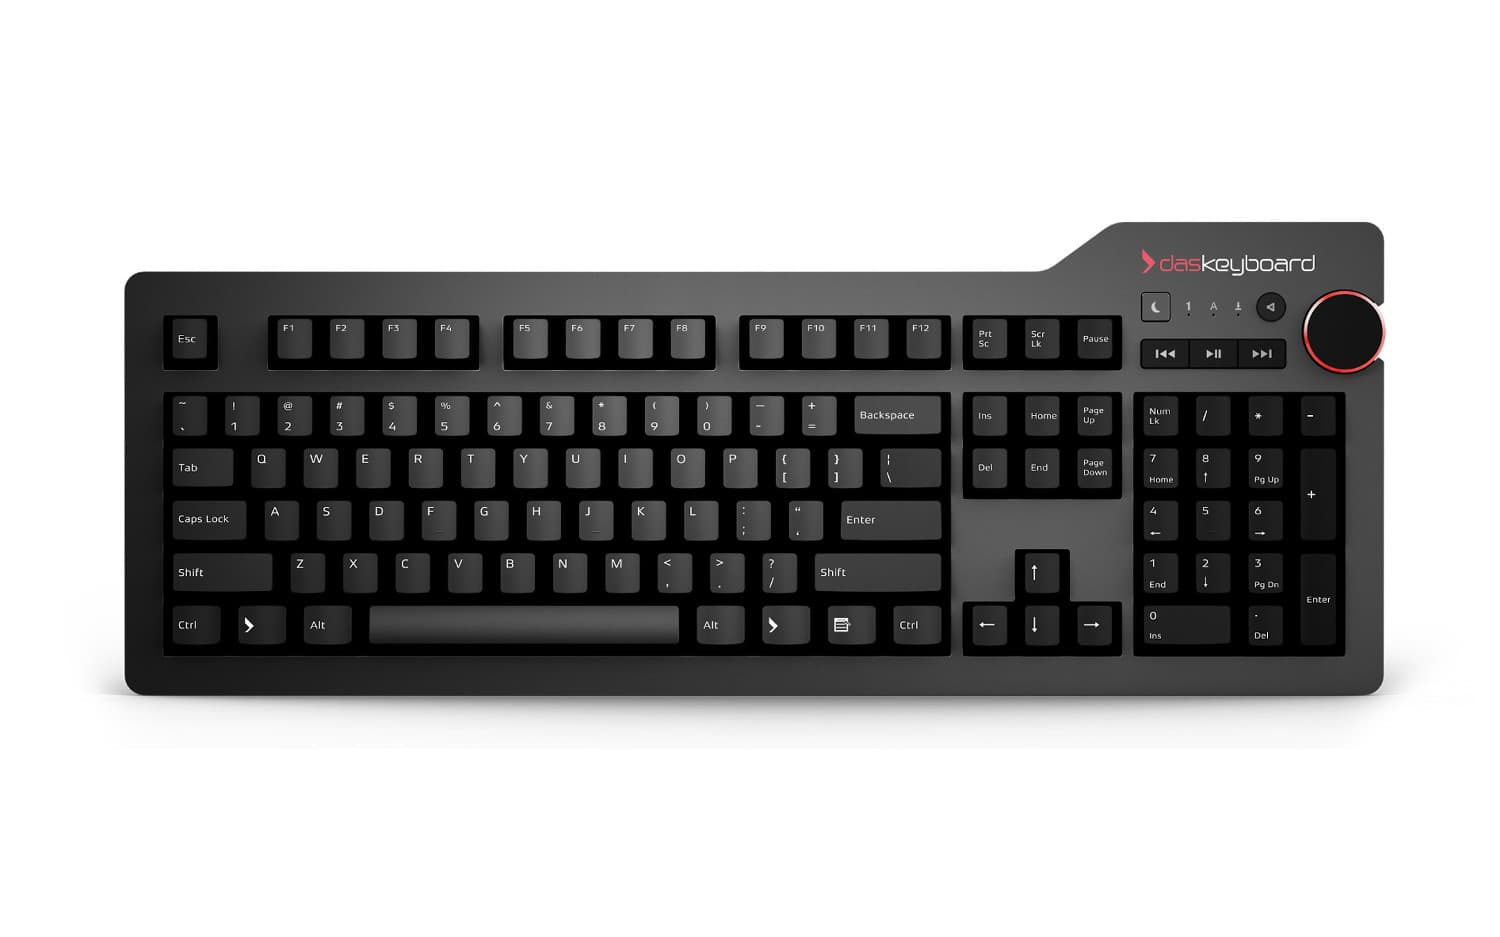
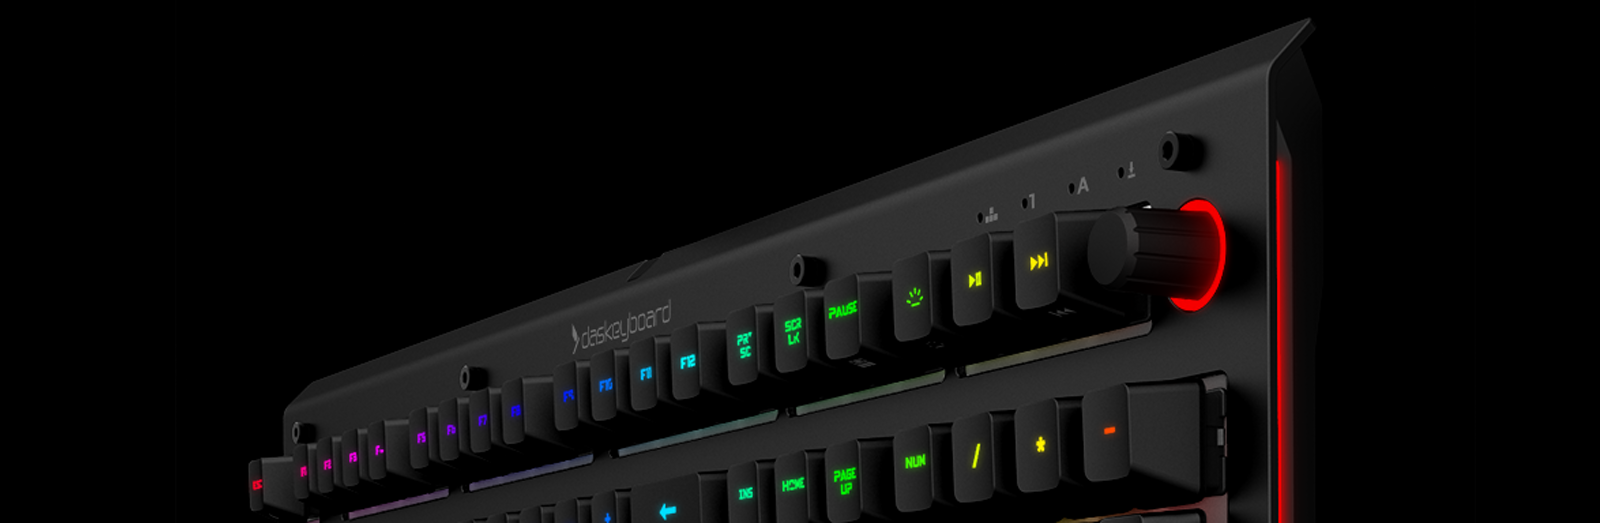
A laser burns the character into the keycap, so it cannot rub off. On light keycaps the burn is dark enough to read on its own; on black keycaps the etched area is filled with a lighter pigment so the character stands out. You can feel the etched character with a fingertip. Das Keyboard uses laser etching.
Dye sublimation
Heat drives a dye into the plastic itself, so the legend is part of the keycap rather than a layer on top of it. It will not wear off. It is more expensive than pad printing, and it only works where the dye is darker than the keycap — you cannot dye-sublimate a light legend onto a dark cap.
How the process actually works
Sublimation is what a solid does when it turns straight into a gas without melting on the way, and that is the whole trick. The artwork is printed onto a transfer film in sublimation dyes. The film is laid against the keycap and pressed under heat, at which point the dye sublimes, passes into the surface of the plastic, and returns to a solid as it cools — now sitting a fraction of a millimetre below the surface rather than on top of it.
Three things follow. There is no layer on top, so there is no edge you can catch with a fingernail and nothing that can scuff away. The plastic has to be one the dye will actually enter, which is why dye-sublimated sets are almost always PBT rather than ABS. And dye only ever adds colour, so the design has to be darker than the blank cap — light legends on a dark cap are not possible this way, which is why dark-on-light is the look you always see.
Printing all five sides
Ordinary dye-sublimation covers the top surface only, because a flat press can reach nothing else. Printing the four side walls as well means wrapping the film around the cap so the artwork carries over the top edge and down each face without breaking — and every cap has to line up with its neighbours once installed, or the pattern fractures at the seams.
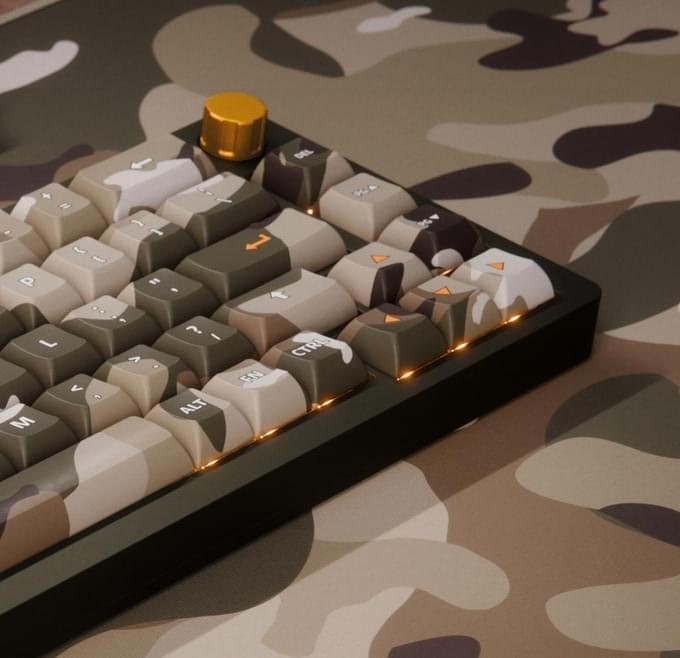
The DeltaForce 65 is printed this way: PBT caps in the KCA profile, camo dye-sublimated across all five faces, so the pattern runs unbroken across the board instead of stopping at the top of each key.
Double-shot injection moulding
Two pieces of plastic are moulded and fused: one forms the keycap, the other forms the character running all the way through it. The legend cannot wear off because it is structural. It is the most durable and the most expensive method, and the moulds generally limit you to two colours per keycap. Most keyboard makers dropped it on cost grounds, though it has had a revival in enthusiast keycap sets.
Switch types in detail
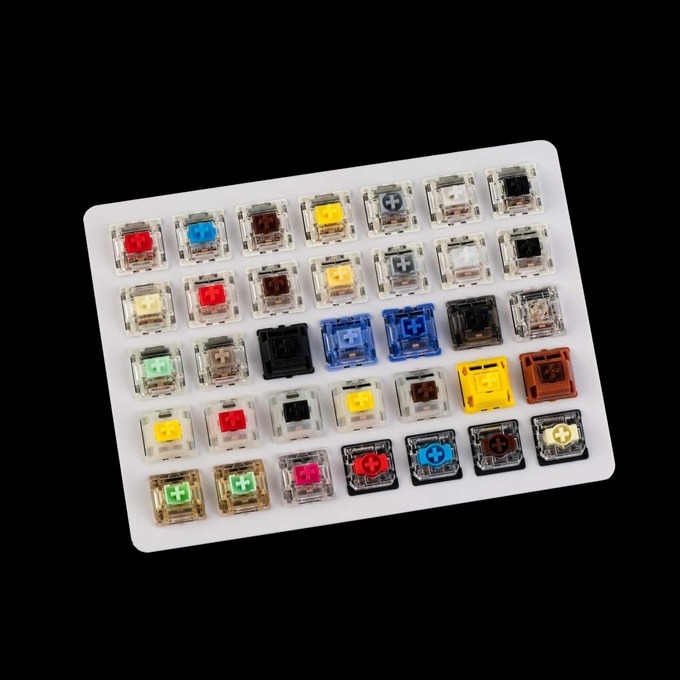
Because mechanical keyboards last, working boards turn up with switches that have not been manufactured in years. Short of opening the case, the switch type is usually identified by the colour of the stem under the keycap.
Cherry MX
A Cherry MX switch is a spring, a plastic stem and two metal contacts. Pressing the key pushes the stem down until the contacts close and the keypress registers. The contacts are gold-plated, which is what keeps them from corroding over a hundred million presses.
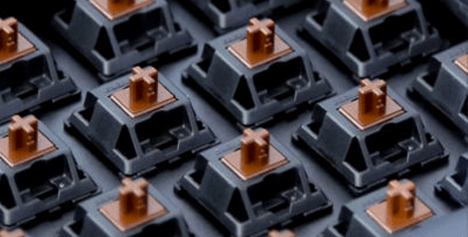
The variants below share that construction and differ in spring weight and whether the stem carries a tactile bump or a click mechanism.
Cherry MX Red — linear, 45 cN
Linear and the lightest of the common Cherry switches. No bump and no click; resistance is constant through the whole press. The light spring is why it is the usual pick for fast repeated keypresses.
Cherry MX Brown — tactile, 55 cN
A soft tactile bump about halfway through the press, without a click mechanism. It sits between a typing switch and a gaming switch, which is why it is the most common recommendation for someone buying their first mechanical keyboard for a shared space.
Cherry MX Blue — clicky, 60 cN
A tactile bump plus a separate click mechanism that fires at the actuation point. The feel is close to a typewriter. It is markedly louder than the others, which is the whole appeal and also the entire objection.
Cherry MX Black — linear, 60 cN
Linear like the Red but with a heavier spring. The actuation and release points sit at the same position, which makes double-tapping predictable. One of the original Cherry MX switches.
Cherry MX Clear — tactile, 65 cN
A larger, more pronounced bump than the Brown and a heavier spring, without the Blue's click. Harder to find in production keyboards. The larger bump also means more friction through the press.
Cherry MX2A
Cherry's revision of the MX design, used on the Das Keyboard 5QS Mark II. Same 100 million keystroke rating and the same actuation points, with a reworked housing and factory lubrication that smooth the travel and tighten the sound.
Gateron Red
A linear switch at 45 cN, pre-lubricated from the factory and rated for 50 million keystrokes. The DeltaForce 65 uses them in hot-swap sockets, so they can be pulled and replaced with a switch puller rather than a soldering iron.
Gamma Zulu
An Omron switch used in several Das Keyboard Q-series boards, rated for 100 million keystrokes with a shorter actuation distance than Cherry MX.
Other switch families
Buckling spring
A spring that buckles sideways under pressure, tripping a small hammer that strikes a membrane sheet to register the keypress. The mechanism in the IBM Model M, and the loudest thing in this guide.
Topre
A hybrid: a spring under a rubber dome, with a capacitive sensor reading the compression rather than a mechanical contact closing. Owners tend to describe the feel as somewhere between a mechanical switch and a very good rubber dome.
Alps
A family of older switches, mostly out of production. The best-known are the "Bigfoot" boards, which came in Complicated and Simplified variants — Complicated Alps came in several colours covering tactile, clicky and linear feels, and are generally considered the better of the two. There are also a lot of Alps clones that look identical from the outside, so identifying what you have usually means opening a switch.
Cleaning and maintenance
The quick version
Turn the keyboard upside down and shake it so loose debris falls out. Then use short bursts of canned air, holding the board at an angle so what you dislodge has somewhere to go. That handles most of it and takes a minute.
The thorough version
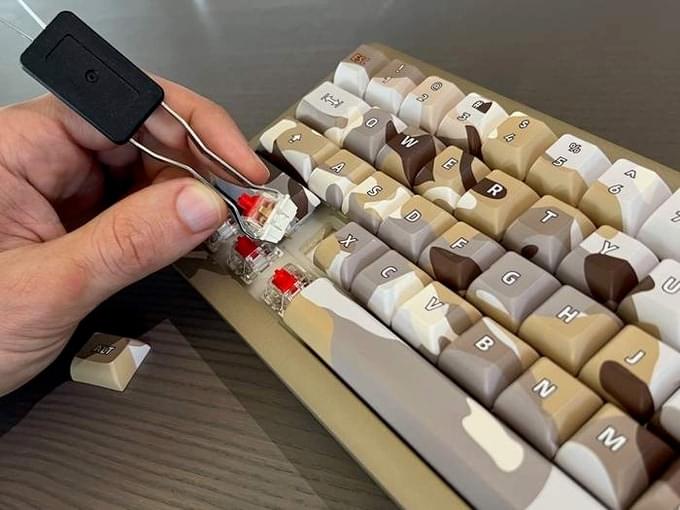
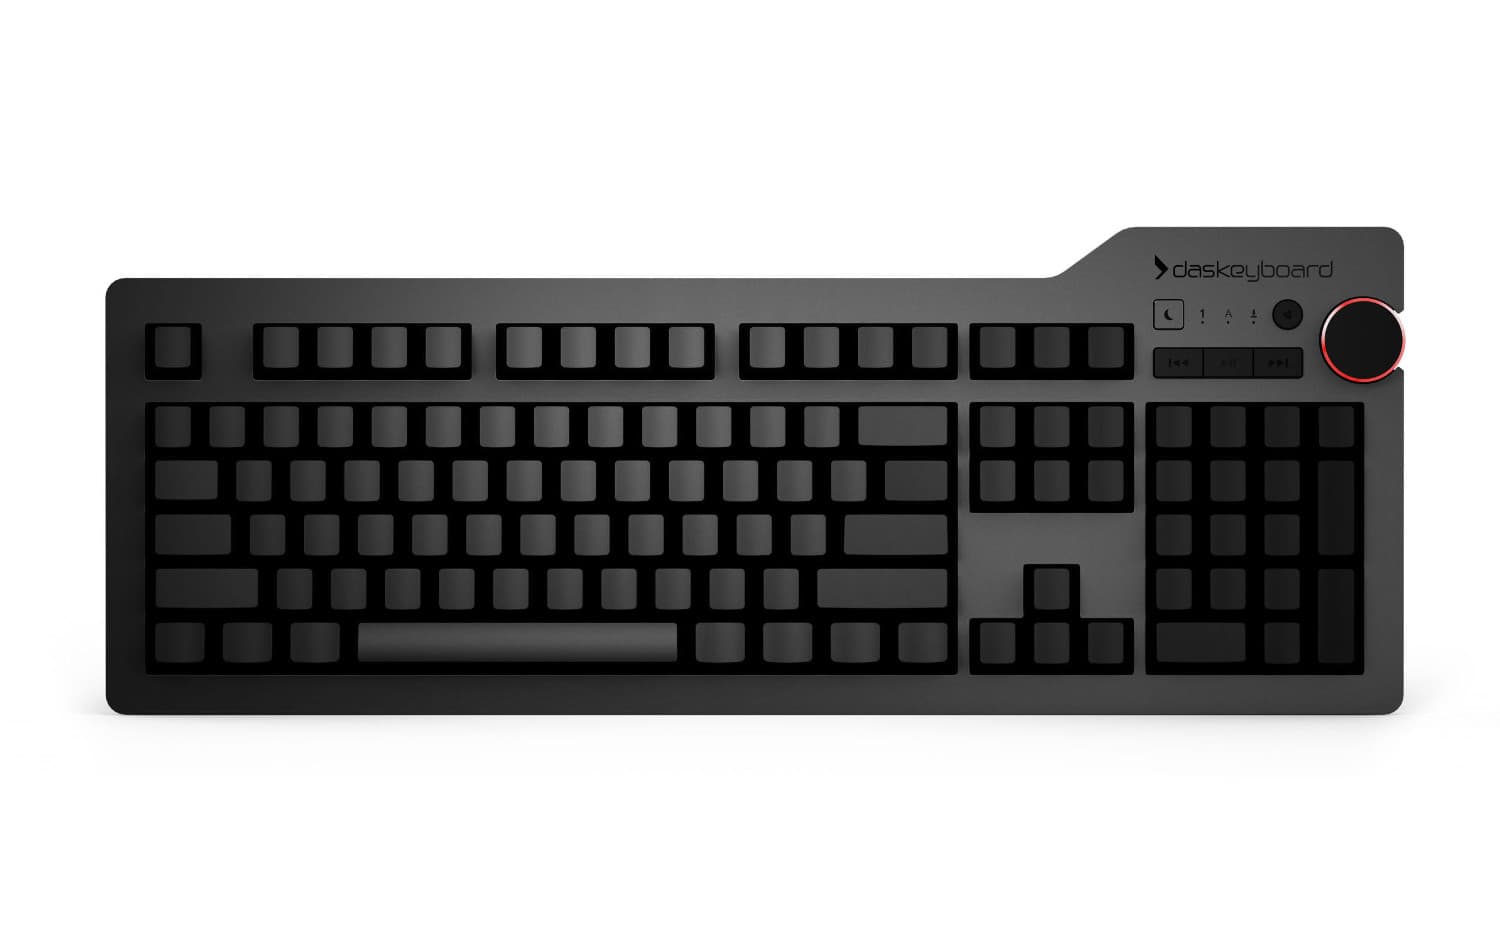
- Pull the small keycaps. Use a keycap puller. Keys are not interchangeable between rows, so photograph the layout or lay the caps out in order before you start — on a blank Ultimate this is not optional advice.
- Leave the large keys alone. The space bar, return key and shift keys sit on stabiliser bars that clip into two small plastic pieces on the underside of the cap. Those pieces break and go missing easily, there are no replacements, and you can clean the board thoroughly without removing them.
- Shake and blow out the case. With the caps off, turn it over again, then use canned air and a soft brush to clear what is left.
- Spills. Dampen a microfibre cloth — never apply liquid to the board directly. A drop of isopropyl alcohol or heavily diluted soap will lift sticky residue. Liquid sitting across a switch contact will hold the circuit closed until it evaporates, which is why a spilled drink produces a key that repeats forever. Check with your manufacturer first: alcohol is fine on Das Keyboards, and not on every board.
- Refit and wipe. Put the caps back, then wipe the tops and the case with a barely damp cloth.
- Dry it completely. Upside down, overnight at minimum, longer in a humid room. Do not plug it in until you are certain.
On the dishwasher question: people do report success, but it means fully dismantling the board first, which usually voids the warranty, and hard or softened water leaves salts and minerals inside that corrode contacts. Alcohol and a cloth are the better tool.
Choosing one
Switch feel is the part you cannot read off a spec sheet, so the shortest path is usually to pick by use case and rely on the return window.
- Mechanical keyboards for programmers — full NKRO, and open QMK/VIA firmware on the DeltaForce 65
- Mechanical keyboards for Linux — class-compliant USB HID, no drivers or daemons
- Mechanical keyboards for Mac — Command and Option where Apple puts them
- Mechanical keyboards for writers — blank keycaps and a full editing cluster
Or browse all Das Keyboard mechanical keyboards and compare them side by side. Direct orders carry a 30-day money-back guarantee, so trying a switch is reversible.
Credits
Keycap and Cherry MX switch photography courtesy of Ripster on Geekhack and Overclock.net. Key cutaway diagrams courtesy of Signature Plastics. Animated Cherry MX illustrations courtesy of Lethal Squirrel on Geekhack.